Tuesday 12 March 2013

Palladium Capelet

A Work in Progress

Before I show the pictures I have of my current project!

You must be aware that I CANNOT share the pattern.

Why not?

I do not actually own the rights of the pattern. Therefore I cannot post it.

Where can I get it?

The pattern on its own has no cost, but if you wish to make this Capelet, you must purchase
the yarn from AMERICO.

Where is that?

456 Queen St. West Toronto, Ontario.
Across the street from JAVA, which is a great place to eat if you like cheap GREAT food!

Do they have a website?

YES and it's right HERE!

Now, onto my pictures!

What I'm using

My yarn: Cadena Alpaquita - Natural 


What it should look like when I'm done!


->!PROGRESS PICTURES!<-

 To be completely honest this is really quite simple. 
 All you have to do it knit and the purl! Super easy!
 I use the markers to show me where the salvage starts and ends, a good tip if you're having trouble.
 Isn't this yarn just beautiful!? I just love it! You can use it for plenty of other patterns too!
 I strongly recommend using the circle needles for this Capelet, they will be a HUGE help when you get to the neck hole at the end that's for sure!
Don't forget to check out their website! You can also find and like them on FaceBook! 


HAPPY KNITTING EVERYONE!

More pictures will come soon as I complete my project!

Look forward to them!

A           A
O      O
> \_/'\_/ <


Tuesday 20 November 2012

Christmas Scarf Collection

Bulky Baby Yarn - Kim

Red Heart Forest Green - Austin

Red Heart Blush Pink - Michelle

Mint Green and Woven Mint - Mom

Red Heart Black - Darien

Camo - Liam

Americo Blue - Colin

Fall Mosaic - Mum

Americo Yellow - Taylor

Red Heart Sky Blue - Dad

Winter Mosaic - Louise

Monday 5 November 2012

Knitting Project #3

Simple Cable Scarf

While at a get together with some new friends, I was taught how to create the simple cable! Also gifted with beautiful soft fluffy purple yarn, to create the scarf with!

My Pattern:

Cast on 22 sts. K4 rows

  1. K3, P5, K6, P5, K3
  2. K8, P6, K8
  3. K3, P5, K6, P5, K3
  4. K8, P6, K8
  5. K3, P5, Slip 3 sts. to cable needle in back, K3, K3 from cable, P5, K3
  6. K8, P6, K8
  7. K3, P5, K6, P5, K3
  8. K8, P6, K8
End with row 8. K4 rows. Bind off.

Pictures:


Crochet Project #2

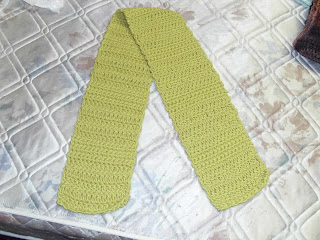
Fluffy Winter Scarf

With the weather getting colder by the day, I decided to craft myself a wonderfully soft and plush scarf. I used ultra thick plush baby yarn which can be purchased at Michael's craft store for $3.49 plus tax per ball.

My Pattern:

Chain 15 sts

DC (Double crochet) to desired length. Bind off.

Picture:
(Coming soon!)

Thursday 23 August 2012

Knitting Project #2

Baby Blanket

My step sister is pregnant with a bouncing baby boy! She's due in February so I would like to create a blanket for her soon to be son. It will be a simple design with two colours. Coffee brown and nature green. 

My Pattern:


Pictures:

Thursday 16 August 2012

Knitting Project #1


Since I had to place my Crochet Project #1 on hold due to running out of yarn, I began a new project. Only this time, in knitting!

Every year I like to make scarves for people to wear for the holidays. I usually give them as Christmas gifts. I try not to make them fancy or anything unless they are for someone special. However this scarf that I am making is not for someone special, I think I may donate it to charity for those who don't have a scarf to wear during the cold weather.

My Pattern:
Cast on 20 stitches.
Knit to the end.
Repeat until cast off.

Scarf Complete!

Wednesday 8 August 2012

Crochet Project #1


Blue Blanket for Twin Size Bed
  There are a few people who think that the craft of crochet, is something only elders do. Though of course that information is only partially correct, considering very many of the younger population from age six and up have begun the craft. It is also being taught in schools, as well as comunitee group services.
Though that is not my point here, I am here to tell you about the recent project I brought upon myself. I started this blanket around April 14th of this year (2012), and am currently just over half complete.
My Pattern:
-> Create the slip knot/starting point, chain 202.
-> First row: Double crochet from the second chain closest to the hook, repeat to the end. Turn
-> Second row: Double crochet from the second chain closest to the hook, repeat to the end. Turn.
-> Continue to desired length.
-> For last four rows: Single crochet from the second chain closest to the hook, repeat to the end. Tie off.
*To tie off: Cut yarn/material 6-12 inches from the hook, pull the yarn/material through last chain tightly. Weave hanging thread through last row. Do the same for the beginning hanging thread, only weave through first row*
I will edit this post with pictures when my project is complete! More projects to come, so please stay tuned! <3